 BraveCL
How to create a Mac app icon from your own artwork
Import an image into Vector Icons, compare finishes, accept a gradient, and check your finished Mac app icon at small sizes.
- What you'll achieve
- You will have an app icon made from your own artwork with a selected Deep Gradient finish, ready to review in the Compose workspace at full and small icon sizes.
- What you need
- Vector Icons 2.0 installed on your Mac.
- A PNG or other compatible local image file you have permission to use.

Vector Icons 2.0 lets you begin with your own image instead of a catalog symbol, apply a finished treatment, and inspect the result in one workspace. This guide follows the same real Mac app workflow shown in the first App Store screenshot.
1.Start from the icon composer
Open Vector Icons in the Compose workspace. The starting canvas shows the Smartphone symbol. Use Import artwork to replace the starter with your own image.

Vector Icons Compose workspace showing the starter Smartphone symbol before a custom image is imported. 2.Import your image
Choose a local image with Import artwork. The Replace source confirmation shows the current Smartphone symbol and the selected file, such as rocket-artwork.png. Check that the new source is correct.

Replace Source confirmation comparing the Smartphone starter icon with the selected rocket-artwork.png file. 3.Confirm the new artwork
Click Replace source to use the selected image. The center preview now displays the artwork inside the app icon, and its file name appears below the preview.

Vector Icons composer displaying the imported rocket image on a blue app icon with small-size previews. 4.Compare the seven finishes
Change the Workspace selection to Finishes. Review the seven rendered treatments for the same artwork, including Clean Solid, Deep Gradient and Paper Lift, before choosing one.

Seven icon finish previews for rocket-artwork.png including Clean Solid and Deep Gradient. 5.Preview Deep Gradient
Select Deep Gradient. Vector Icons opens a split comparison of Reference A and Trial B so you can see the original and the proposed gradient side by side before committing to it.
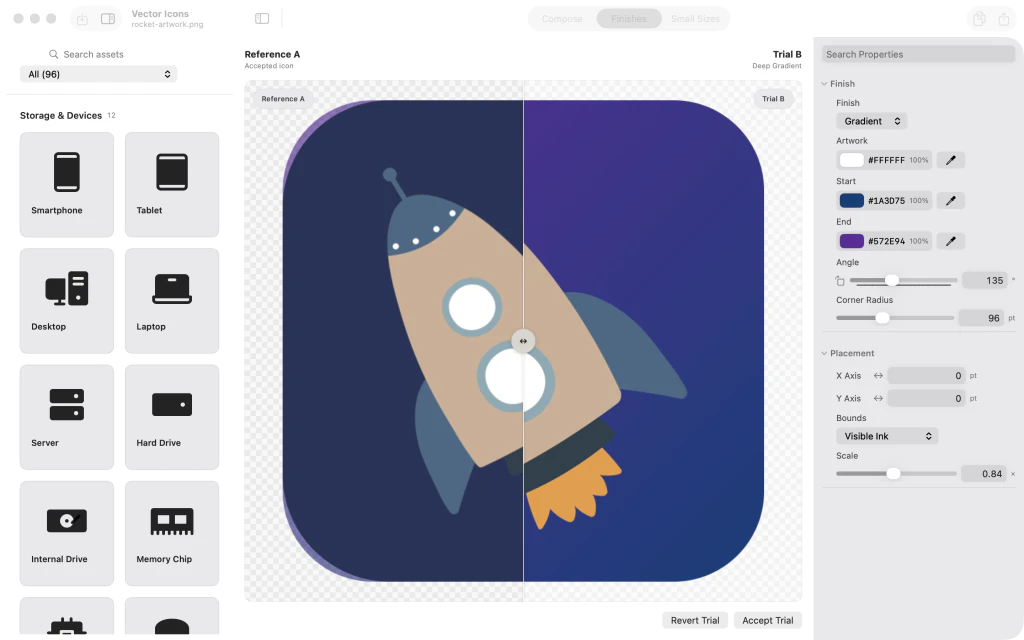
Split Reference A and Trial B comparison showing the rocket artwork before and after Deep Gradient. 6.Keep the gradient treatment
Press Accept trial to keep the selected finish. Back in the finishes gallery, Deep Gradient is marked as the accepted result.

Finishes gallery with Deep Gradient selected and accepted for the imported rocket artwork. 7.Review the finished icon at small sizes
Return to Compose with the Workspace selector. Check the finished icon, its imported artwork file name, and the 16 pt and 32 pt previews to see how the result reads at small sizes.

Final Vector Icons Compose workspace showing the rocket app icon on a purple gradient with 16 pt and 32 pt previews.


Tips
Check the file name in the replacement confirmation before changing your source.
Compare multiple finishes before pressing Accept trial; a preview does not mean the change is accepted.
Check the 16 pt and 32 pt previews before exporting a full asset set.
Watch outReplacing the source changes the artwork used for the current icon design; verify that the replacement is intentional.
Watch outThis guide ends with a designed icon in the workspace. Exporting an AppIcon asset set is a separate delivery task.

