 BraveCL
How to preview file date changes on Mac
Preview changes to creation and modification dates across a group of files on Mac before applying anything.
- What you'll achieve
- You have a named group of four documents with a proposed three-year date shift, a reviewed plan, and a selected file ready for inspection.
- What you need
- File Date & Time Editor installed on a Mac.
- Several documents whose creation or modification dates you want to examine; make copies before making changes to originals.

File Date & Time Editor lets you organize documents into a named job, group related files, and review original versus proposed timestamps before writing changes. This walkthrough uses four sample family documents and stops before applying the plan.
1.Inspect the files before import
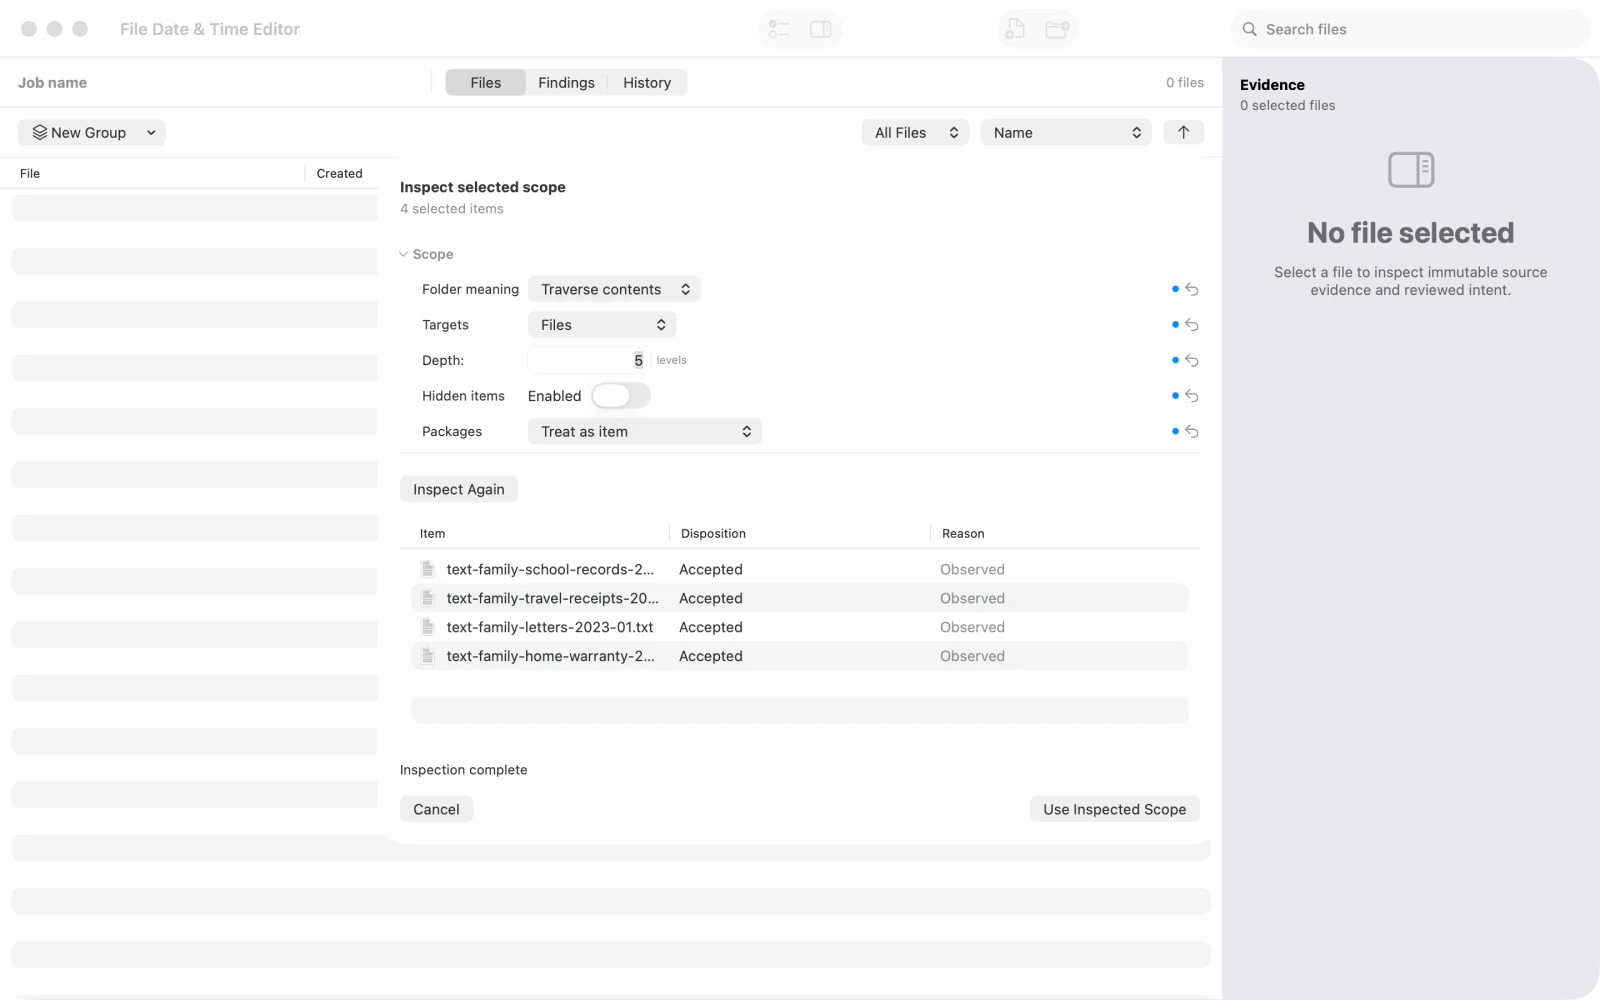
Add the documents you want to check. When the intake sheet opens, choose Start to inspect which files are eligible and which need attention.
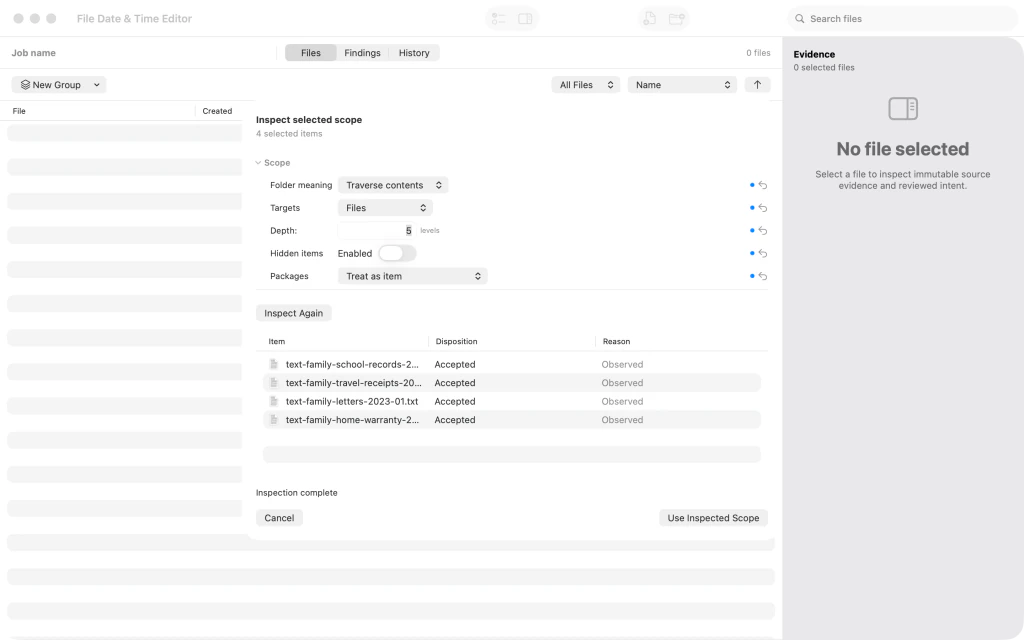
The intake scope inspection for four family document files before admission. 2.Accept the inspected documents
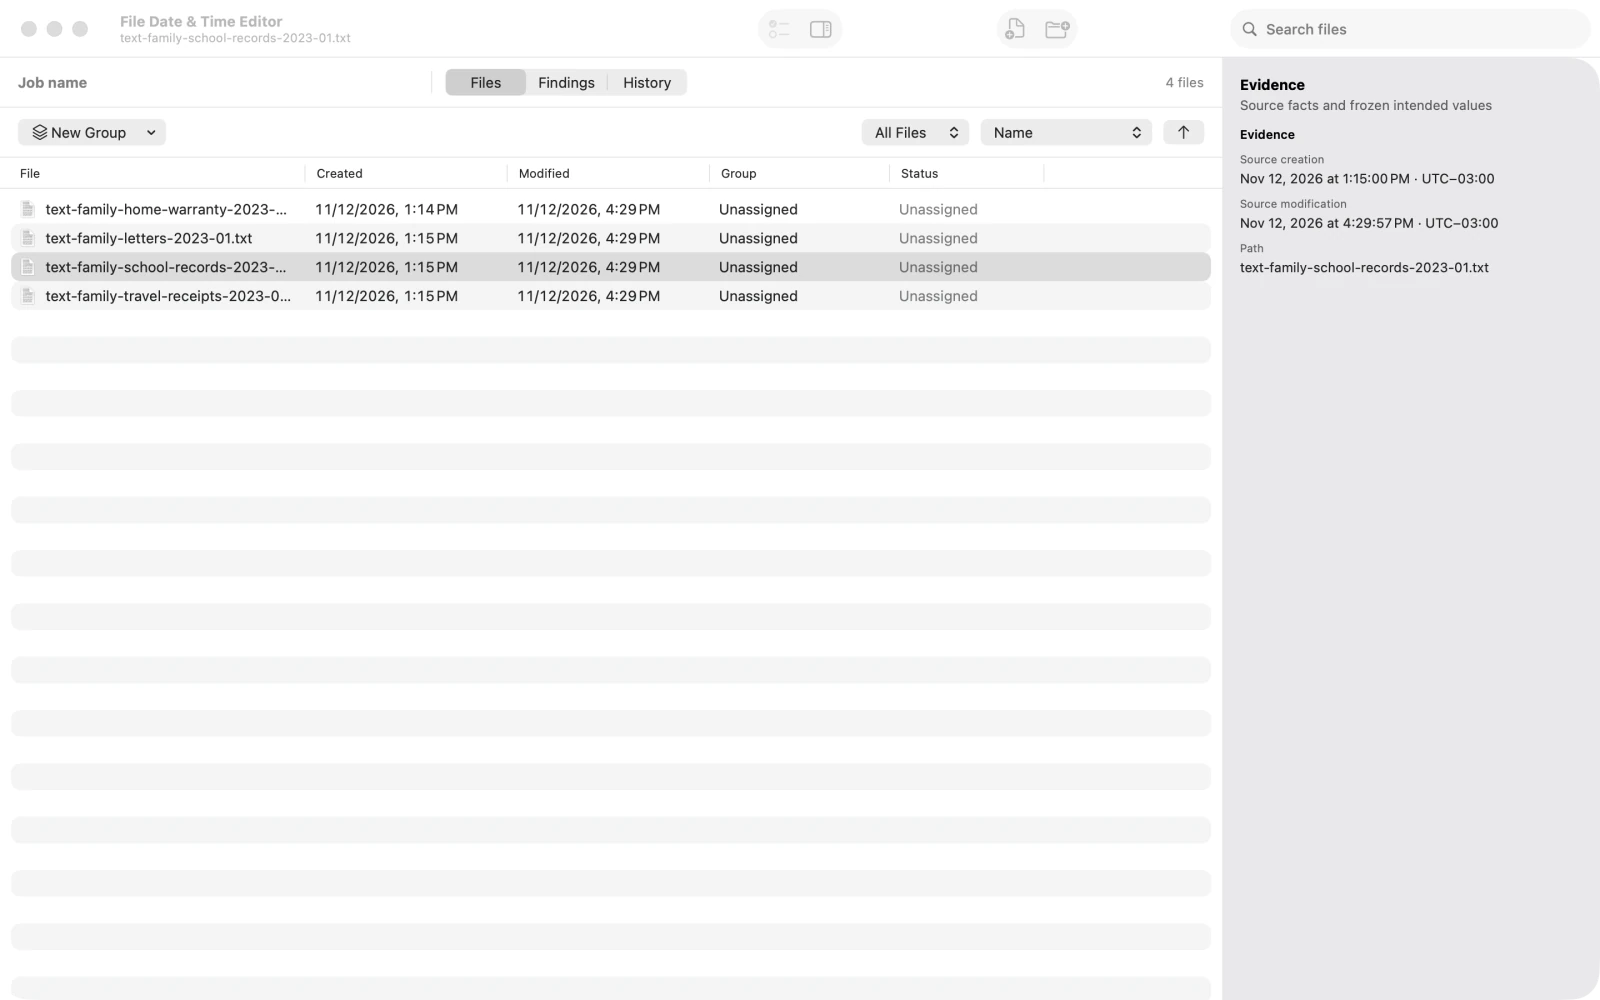
Check the inspected scope, then accept it to add the four documents to the workspace. The file list now shows the imported items and their existing dates.
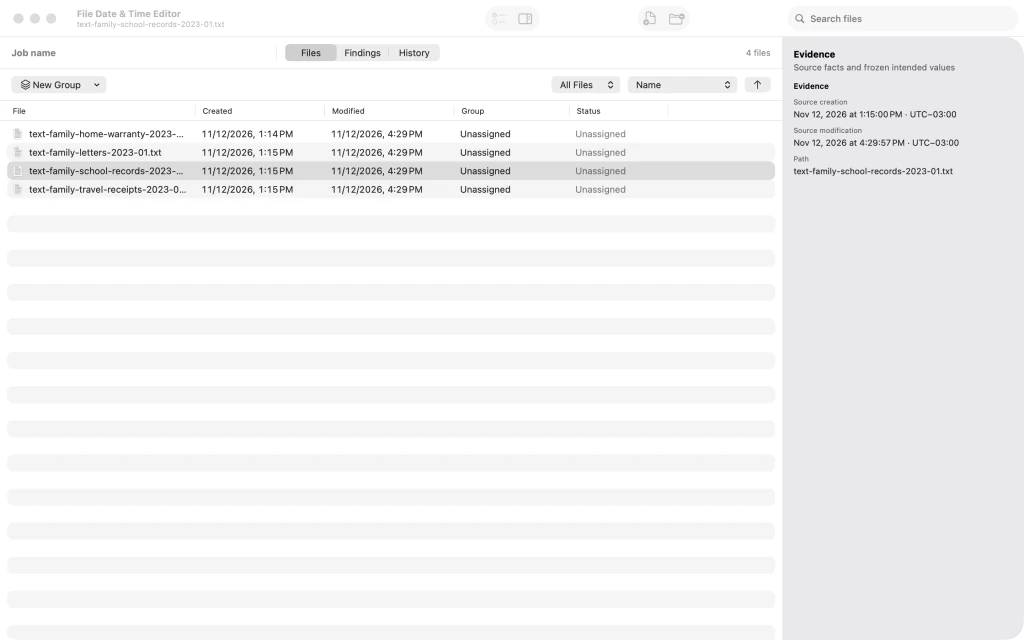
Four inspected family documents in the file list with original dates. 3.Name the chronology job
Use Chronology job name to give the batch a recognizable name, such as Family Chronology - Home Transfer. Naming a job does not change file timestamps.

The named Family Chronology - Home Transfer job with imported documents. 4.Select the documents to correct together
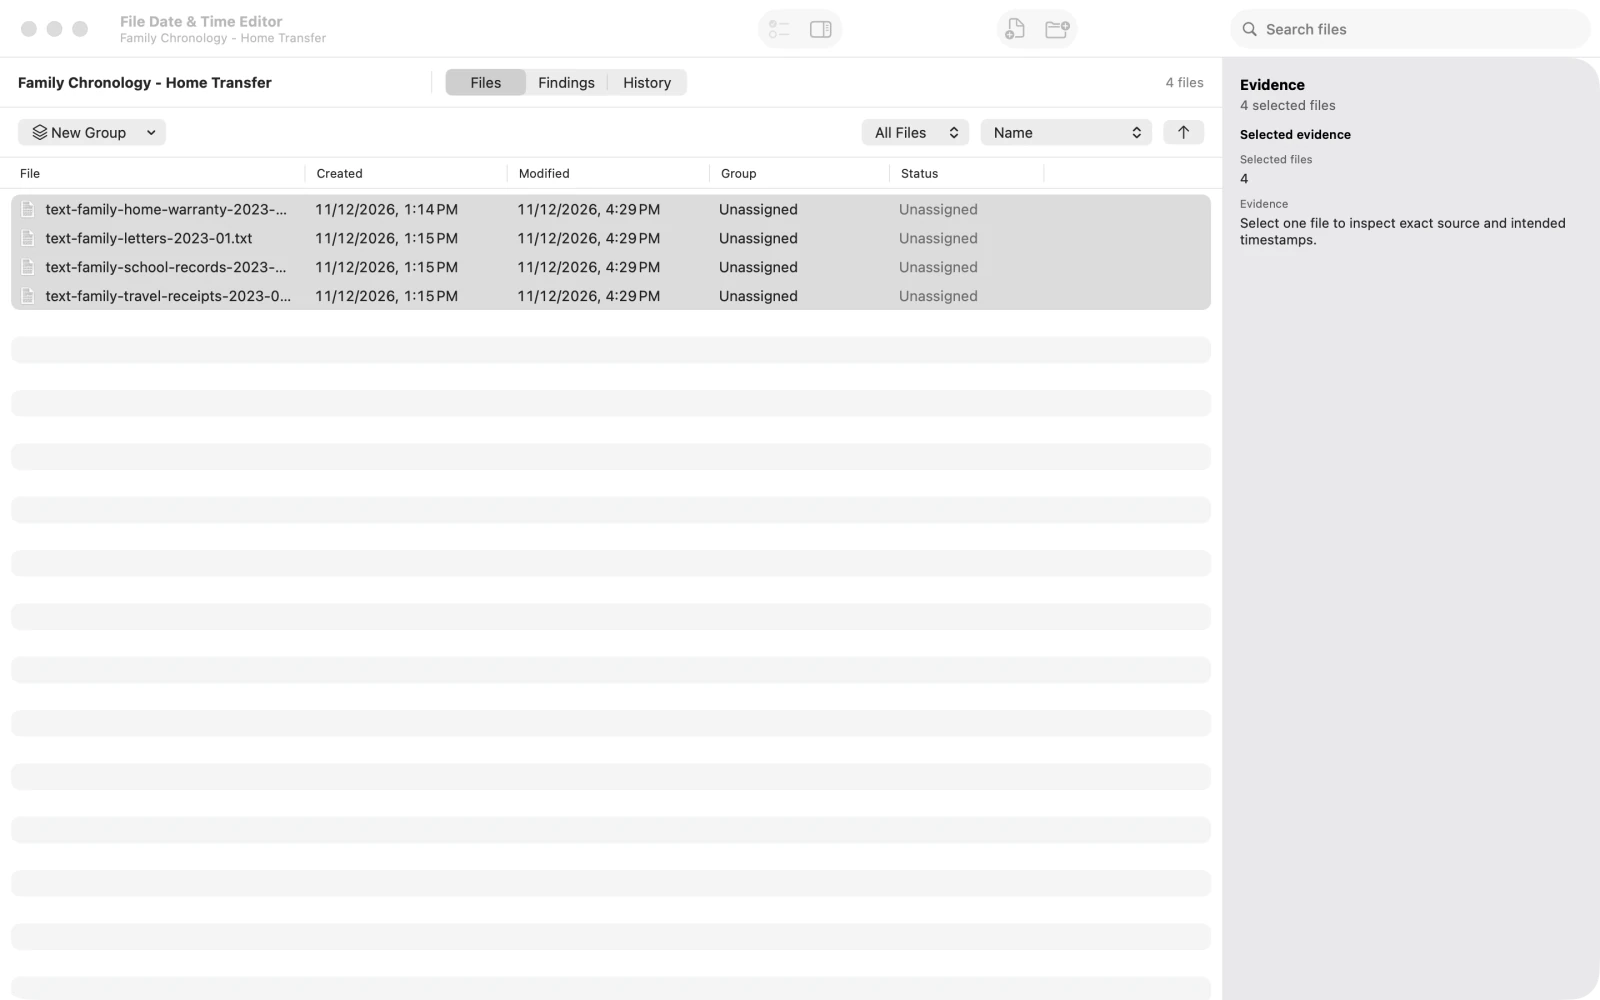
Select the imported document rows you want in the same correction group. This example uses four related family papers.
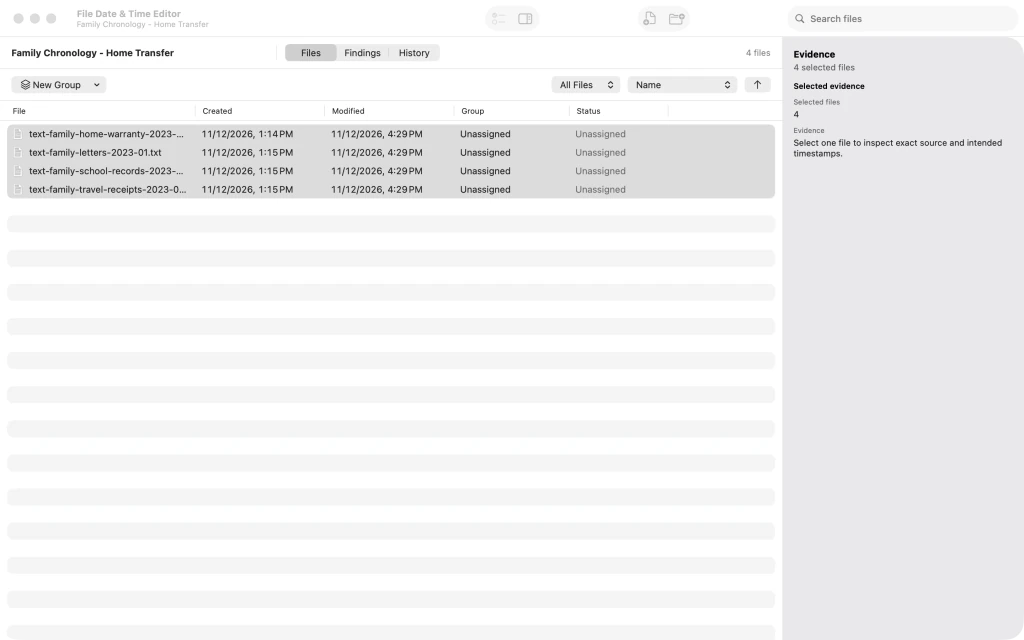
Four family document rows selected together in File Date & Time Editor. 5.Set a relative three-year shift
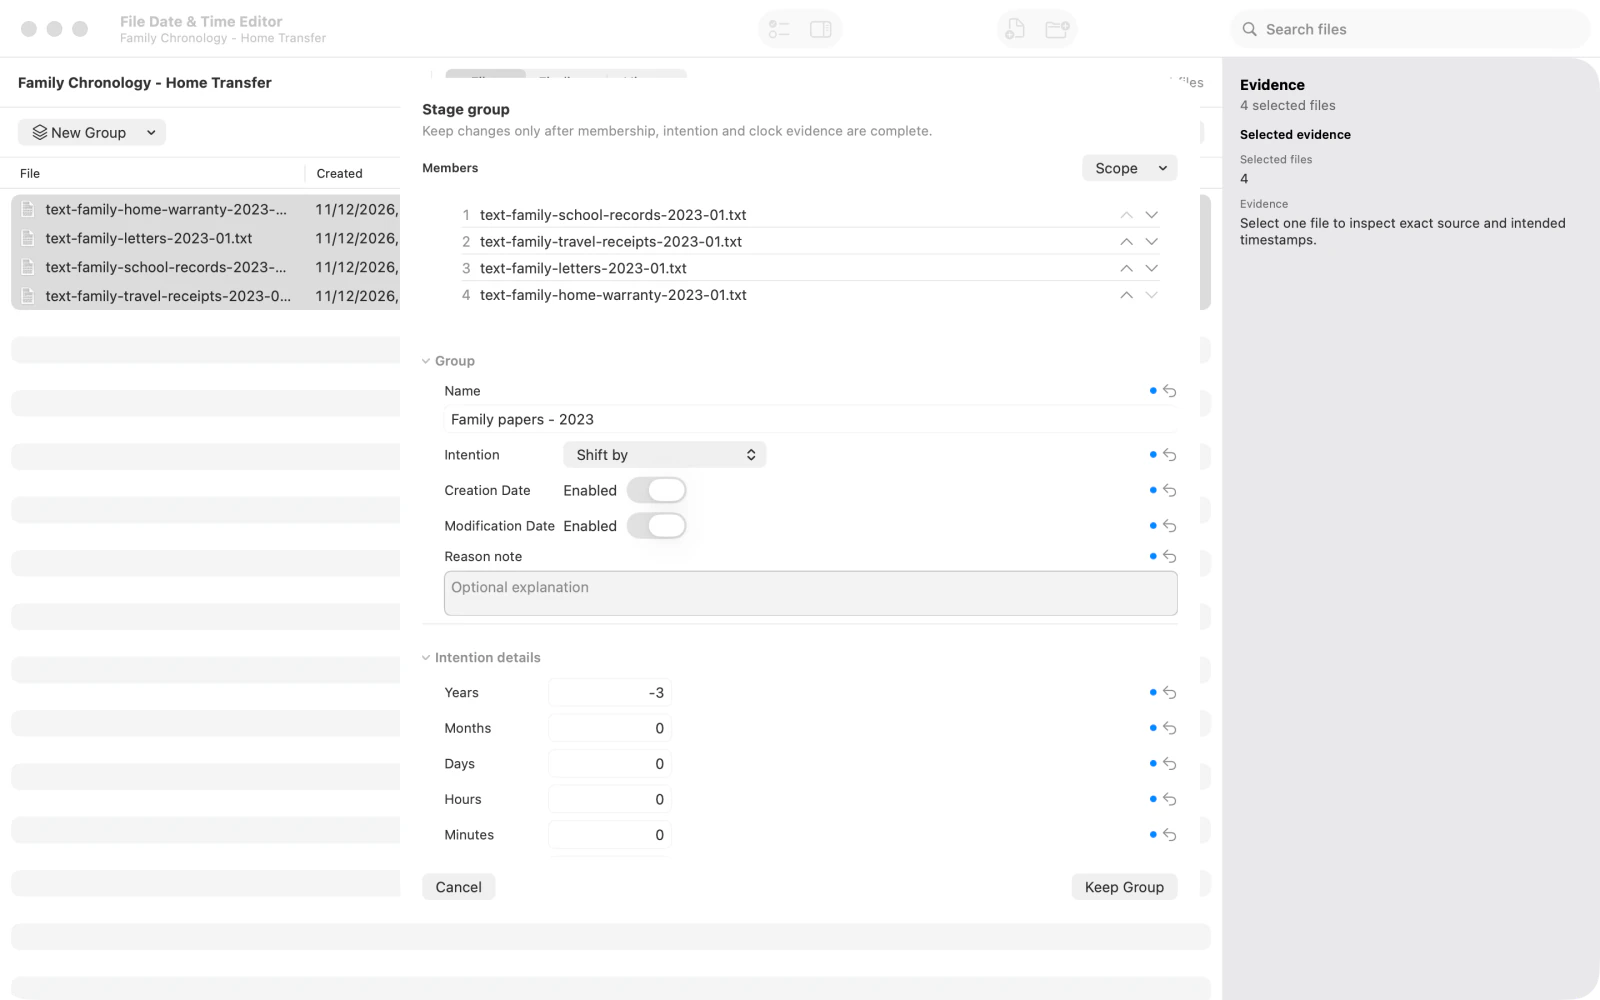
Name the group Family papers - 2023. Set Intention to relative and Years to -3. Leave Creation Date and Modification Date enabled if both timestamps should be included in the plan.
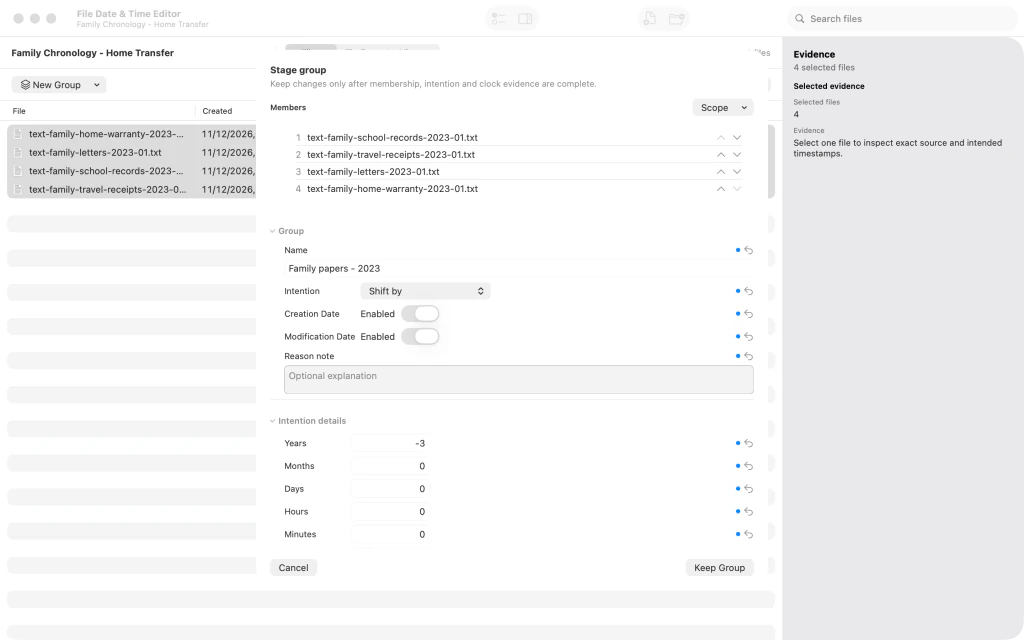
Relative timestamp group Family papers - 2023 configured for minus three years. 6.Keep the planned correction group
Save the named group. The file list now reflects a planned relative date adjustment for the selected documents; no changes have been applied to the files.

The named three-year timestamp adjustment group saved in the workspace. 7.Review the planned date changes
Open the plan review to compare each original timestamp with its proposed value and inspect any unresolved results. Review the entire plan before deciding whether to apply it.
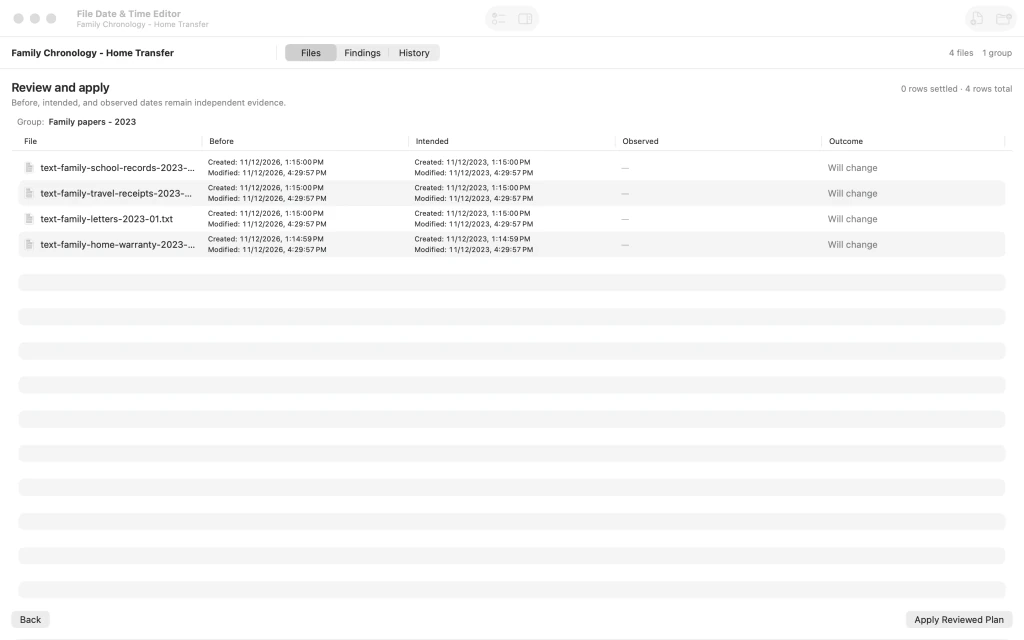
Review and apply page comparing original and proposed timestamps for the four documents. 8.Inspect an individual file's dates
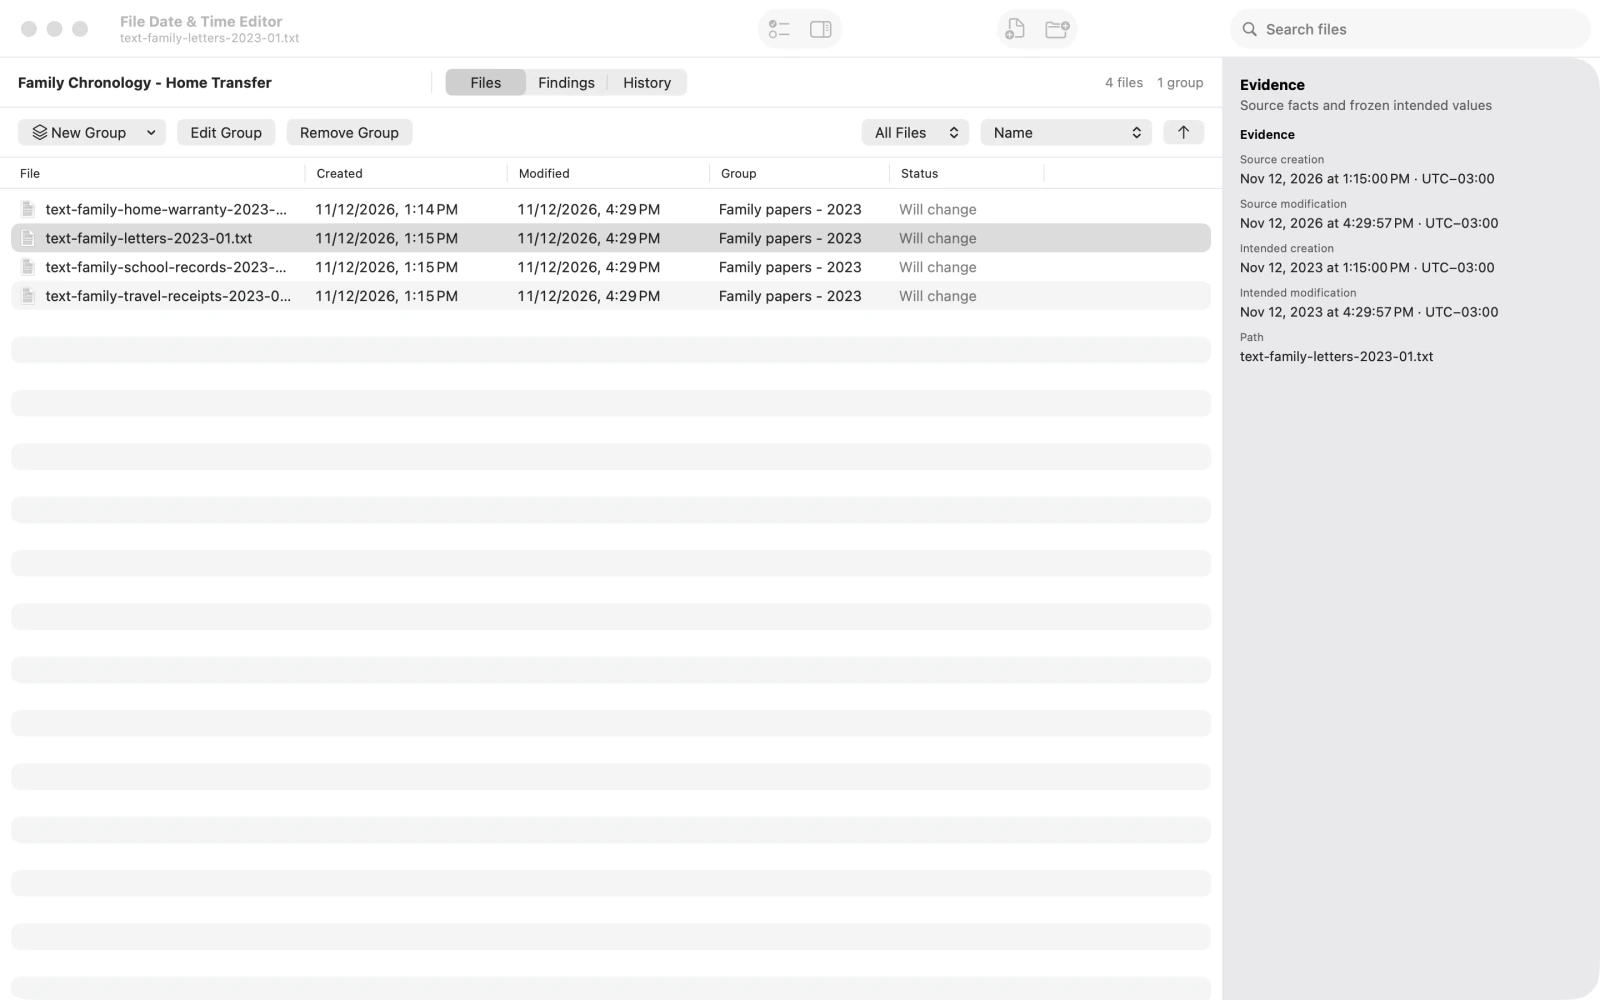
Return to the file list and select the letters document. The inspector shows the selected file's date information beside the grouped plan. This guide ends at the preview stage without applying the change.
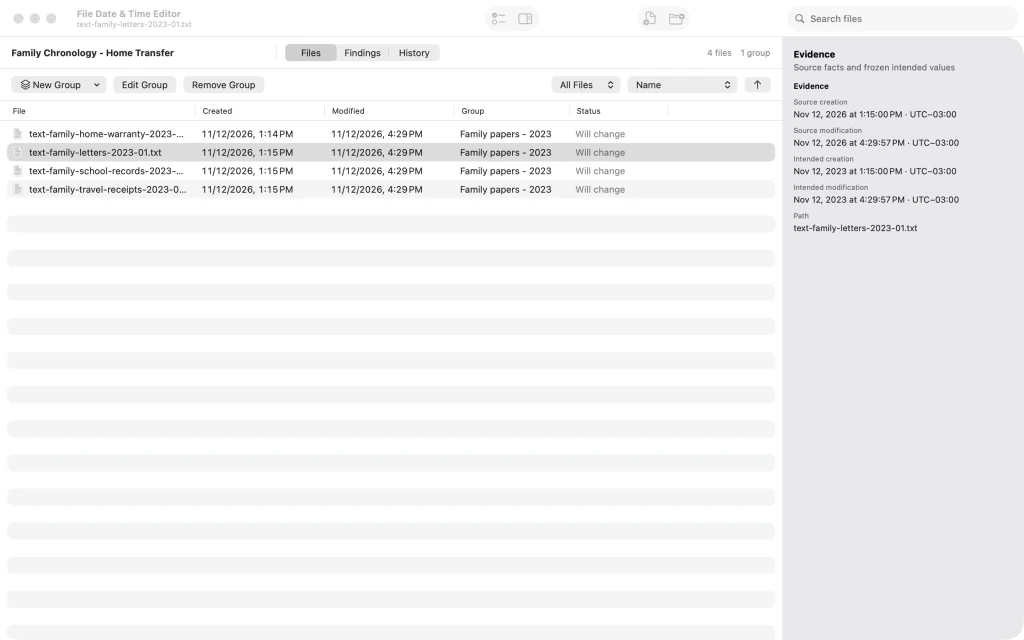
The selected letters document in the file inspector with date information.



After the last step
No source file has been modified.
Tips
Use descriptive job and group names so each planned correction is easy to identify.
Review the original and proposed values for every file before applying any changes.
A negative value in Years moves the planned timestamps backward; -3 is a three-year shift.
Watch outThis walkthrough previews changes only. Do not click Apply until you have verified the plan and backed up important files.
Watch outFile-system creation and modification dates are different from embedded photo metadata; this example does not edit embedded metadata.

